3.1.1 Rotation
Rotate a NumPy image array by an arbitrary angle with `scipy.ndimage.rotate`, then turn that one call into a fan-shaped composition by accumulating rotated copies with additive blending.
Overview
A rotation is a geometric transformation that preserves distances. Every pixel travels along an arc around a chosen pivot, and the picture as a whole turns by a single angle. Computationally it is one library call — scipy.ndimage.rotate — but it is also the first transformation in this module that produces resampled pixels: most rotated coordinates do not land on integer grid positions, so the library has to interpolate. In this lesson you will rotate a single shape, watch interpolation smooth the edges, and then iterate the rotation in a loop to draw a radial fan from one rectangle [1].
Learning objectives
- Rotate an image array by any angle with
scipy.ndimage.rotateand read off the side-by-side comparison. - Distinguish the four parameters that decide what a rotation looks like — angle, pivot, interpolation order, output reshape.
- Choose between
reshape=True(no clipping, larger output) andreshape=False(same size, clipped corners). - Stack rotated copies of one shape into a fan composition using additive blending.
Quick start — one 45° rotation
import numpy as np
from scipy import ndimage
from PIL import Image

canvas_size = 400
image = np.zeros((canvas_size, canvas_size, 3), dtype=np.uint8)

# A cyan rectangle, centred horizontally
image[150:250, 100:300] = [0, 200, 200]

rotated = ndimage.rotate(image, 45, reshape=False, mode='constant', cval=0)

# Side-by-side: original on the left, rotated on the right
comparison = np.zeros((canvas_size, canvas_size * 2 + 20, 3), dtype=np.uint8)
comparison[:, :canvas_size] = image
comparison[:, canvas_size + 20:] = rotated

Image.fromarray(comparison).save('simple_rotation.png')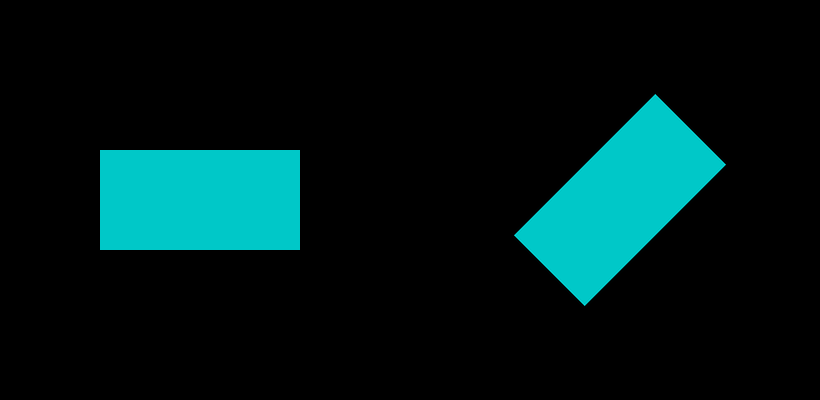
Core concepts
Concept 1 — The rotation matrix
A 2D rotation by angle θ around the origin is the linear map whose 2×2 matrix is
R(θ) = | cos θ   -sin θ |
       | sin θ    cos θ |
Multiply any column vector (x, y)ᵀ by R(θ) and you get the rotated point [2]. The matrix is orthogonal — its transpose is its inverse — which is the algebraic statement of “rotation preserves lengths.” scipy.ndimage.rotate does this for you; you write the angle in degrees and the library converts to radians, builds the matrix, and applies it pixel by pixel.
Concept 2 — Pivot, interpolation, and reshape
Four parameters decide the output of a rotation.
- Angle — degrees, signed.
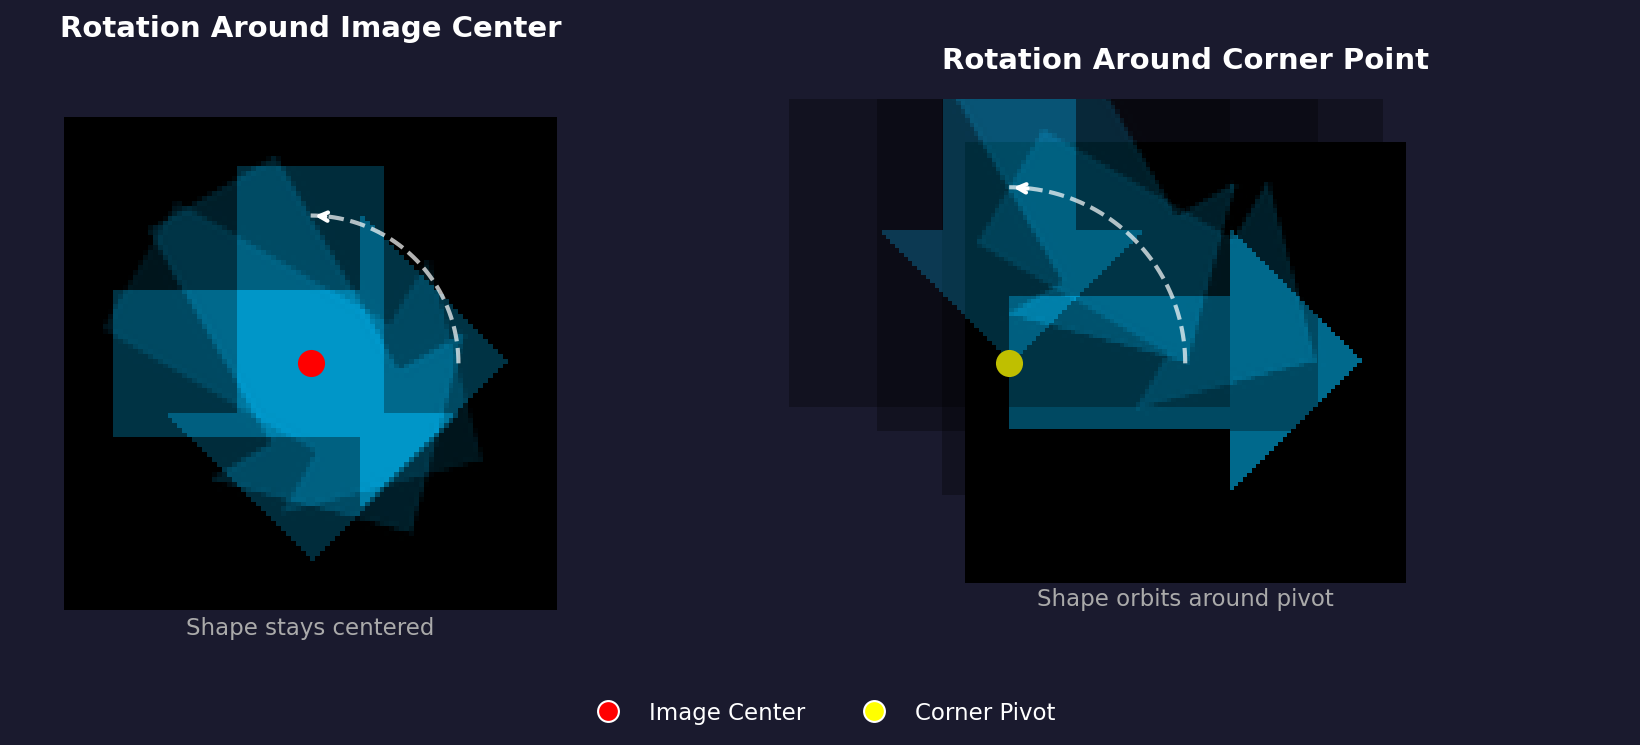
- Pivot — the point that does not move.
ndimage.rotatealways uses the image centre; if you want a different pivot you translate the image first. - Interpolation order — how to compute the colour at a rotated coordinate that falls between grid cells.
order=0is nearest-neighbour (fast, blocky);order=1is bilinear (the default, a good balance);order=3is cubic (smoother but slower) [3]. - Reshape —
reshape=Trueenlarges the output so every rotated pixel still fits;reshape=Falsekeeps the original size and clips the four corners that swing outside the frame.
The reshape choice is the trade-off you have to make every time:
clipped = ndimage.rotate(image, 45, reshape=False)
print(clipped.shape)   # (400, 400, 3) — corners gone

full    = ndimage.rotate(image, 45, reshape=True)
print(full.shape)      # (566, 566, 3) — bigger canvas, nothing lost
Reshape True is right for archival output; reshape=False is right when you are layering many rotated copies onto a fixed-size canvas, because all the copies need the same dimensions to add together.
Concept 3 — Iterated rotations as composition
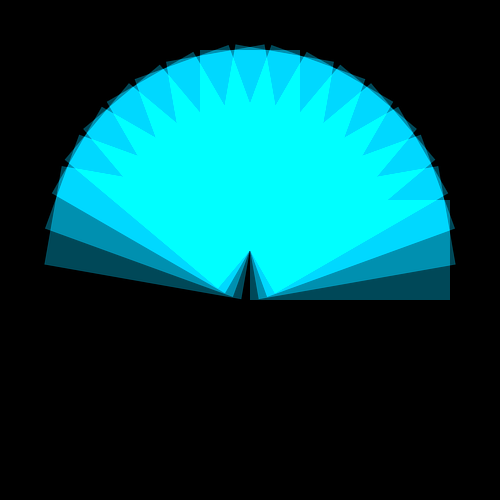
Once one rotation is a single library call, $N$ rotations are a loop. The rotated copies share the same canvas dimensions (because reshape=False), so they can be summed pixel-by-pixel. The classic move is additive blending: convert to int16 to dodge overflow, add scaled contributions, then clip back to uint8. With an off-centre rectangle, eighteen rotations spread across 180° trace the fan shape in Figure 3.
shape = np.zeros_like(canvas)
shape[200:300, 250:450] = [0, 180, 220]  # off-centre rectangle

for i in range(18):
    rotated = ndimage.rotate(shape, i * 10, reshape=False)
    canvas = np.clip(
        canvas.astype(np.int16) + (rotated * 0.4).astype(np.int16),
        0, 255,
    ).astype(np.uint8)
The 0.4 scaling is what stops the overlapping centre from saturating to pure white on the second or third rotation. Each contribution stays sub-maximal, and only the regions that many rotations overlap reach full brightness — that gradient is what makes the fan readable [4].
Exercises
Three exercises in Execute → Modify → Create order: run the fan pattern, change three parameters at once, then build a single-rotation compositor from scratch.
Run the 18-rotation fan
Run rotation_pattern.py from the downloads. It draws an off-centre cyan rectangle, then rotates it 18 times across a 180° spread, blending each rotation into the canvas.
Reflection questions
- Why is the centre of the fan brighter than the outer edges?
- What would happen if you swapped the additive blend (
np.clip(canvas + contribution)) for a plain overwrite (canvas[mask] = rotated[mask])? - Why does the rectangle being off-centre matter for the fan shape?
Answers
Bright centre — every rotated copy passes through the image centre (that is the pivot). Every contribution adds to those pixels, so they saturate first. The outer pixels only get one or two contributions, so they stay closer to their per-rotation colour.
Overwrite instead of add — the picture would look like a single rotated rectangle, because each iteration replaces the previous one. Iteration only builds a composition when the operation accumulates (sum, max, blend), not when it replaces.
Off-centre rectangle — a centred rectangle rotates in place: every rotation overwrites the same region. Offsetting the rectangle from the pivot is what makes each rotation sweep a different arc, which is what produces the fan silhouette.
Three pattern variations
Edit rotation_pattern.py to produce these three pictures. Each goal changes only the marked variables.
Goals
- Sparse fan — drop
number_of_rotationsto 6 and watch the gaps open up between the rectangles. - Warm palette — change the cyan
[0, 180, 220]to an orange[255, 120, 50]. - Full circle — change the 180° spread to 360° so the fan completes into a wheel.
Goal 1 — what to expect
number_of_rotations = 6Six rectangles, 30° apart. The fan still reads as radial but the individual silhouettes are clearly separated — you can count six of them.
Goal 2 — what to expect
shape[rect_top:rect_bottom, rect_left:rect_right] = [255, 120, 50]Same fan structure, orange instead of cyan. The bright-centre saturation now reads as yellow because the red channel saturates first.
Goal 3 — what to expect
angle_step = 360 / number_of_rotationsThe fan closes into a full wheel. With 18 rotations across 360° the step is 20°, giving you a softer, more symmetrical radial pattern.
Single-shape rotation compositor
Build a small tool that rotates one shape onto a coloured background — no iteration, just clean foreground-over-background compositing.
Requirements
- Dark blue background
[30, 30, 50]. - Orange rectangle
[255, 150, 50], drawn near the centre. - Rotate the shape by 30°.
- Save the composite as
my_rotation.png.
import numpy as np
from scipy import ndimage
from PIL import Image

canvas_size = 400
rotation_angle = 30
background_color = [30, 30, 50]
shape_color      = [255, 150, 50]

# TODO 1: create the canvas and fill it with background_color.
canvas = np.zeros((canvas_size, canvas_size, 3), dtype=np.uint8)

# TODO 2: draw a rectangle on a separate black layer (shape_layer)
#         using shape_layer[top:bottom, left:right] = shape_color.
shape_layer = np.zeros((canvas_size, canvas_size, 3), dtype=np.uint8)

# TODO 3: rotate the shape_layer with ndimage.rotate(..., reshape=False, mode='constant', cval=0).

# TODO 4: build a boolean mask of where the rotated layer has any colour,
#         then copy those pixels onto canvas — canvas[mask] = rotated[mask].

Image.fromarray(canvas).save('my_rotation.png')
Hint 1 — fill the background
NumPy broadcasts a 3-element list across the full RGB volume:
canvas[:, :] = background_colorHint 2 — mask the rotated shape
The rotated layer is mostly black with the orange rectangle floating somewhere inside. Pick the non-black pixels and copy them over:
mask = np.any(rotated_shape > 0, axis=2)
canvas[mask] = rotated_shape[mask]
np.any(... > 0, axis=2) collapses the RGB axis with a logical OR — a pixel survives if at least one channel is non-zero.
Complete solution
import numpy as np
from scipy import ndimage
from PIL import Image

canvas_size = 400
rotation_angle = 30
background_color = [30, 30, 50]
shape_color      = [255, 150, 50]

canvas = np.zeros((canvas_size, canvas_size, 3), dtype=np.uint8)
canvas[:, :] = background_color

shape_layer = np.zeros((canvas_size, canvas_size, 3), dtype=np.uint8)
shape_layer[150:250, 180:350] = shape_color

rotated_shape = ndimage.rotate(
    shape_layer, rotation_angle,
    reshape=False, mode='constant', cval=0,
)

mask = np.any(rotated_shape > 0, axis=2)
canvas[mask] = rotated_shape[mask]

Image.fromarray(canvas).save('my_rotation.png')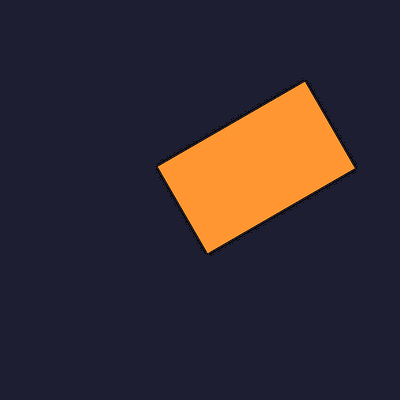
How it works:
- The shape sits on its own black layer so the mask trick has a clean signal.
ndimage.rotate(..., cval=0)fills the rotated-away regions with black, which is what the mask reads as “background — leave alone.”- The composite is a one-line NumPy assignment because
canvas[mask] = rotated[mask]only touches the masked indices.
Make it your own
- Loop
rotation_anglefrom 0 to 360 in steps of 10 and save 36 frames; assemble them withimageio.mimsavefor a spinning-rectangle GIF. - Replace the rectangle with a triangle using the line code from 2.1.2 — the rotation pipeline is shape-agnostic.
- Use the alpha-blend version from Concept 3 — replace
canvas[mask] = ...withcanvas = np.clip(canvas + 0.5 * rotated, 0, 255)— to layer multiple rotated shapes with a soft glow.
Downloads
simple_rotation.py — quick-start side-by-side rotation_pattern.py — 18-rotation fan rotation_starter.py — Exercise 3 starter rotation_solution.py — Exercise 3 referenceSummary
Common pitfalls to avoid
reshape=Trueinside a loop produces outputs of varying sizes that no longer add together — usereshape=Falsefor stacking.- Skipping the
astype(np.int16)cast around the additive blend overflowsuint8and produces black bands where bright regions wrap around to zero. - Centring the shape on the image centre defeats the fan — every rotation lands on the same pixels.
- Default
order=1softens hard edges; if the lesson calls for crisp pixel art, drop toorder=0(nearest-neighbour). - Confusing screen direction with mathematical direction — positive degrees rotate counter-clockwise in maths and clockwise on screen because image arrays index y downward.
References
- [1] Gonzalez, R. C., & Woods, R. E. (2018). Digital Image Processing (4th ed.). Pearson.
- [2] Foley, J. D., van Dam, A., Feiner, S. K., & Hughes, J. F. (1990). Computer Graphics: Principles and Practice (2nd ed.). Addison-Wesley.
- [3] SciPy Community. (2024). scipy.ndimage.rotate. SciPy Documentation. docs.scipy.org
- [4] Pearson, M. (2011). Generative Art: A Practical Guide Using Processing. Manning.
- [5] Szeliski, R. (2022). Computer Vision: Algorithms and Applications (2nd ed.). Springer.
- [6] Harris, C. R., Millman, K. J., van der Walt, S. J., et al. (2020). Array programming with NumPy. Nature, 585, 357–362. doi:10.1038/s41586-020-2649-2